Integrating With Microsoft Exchange

Larger practices may already be using emails and calendars in Microsoft Exchange for their practitioners to use. You can configure Practice Master Pro to automatically synchronise appointments between the two so changes to your appointments in either system will flow back in to the other.

As Microsoft Exchange is a 3rd party application that Practice Master has no control over there are a few points to note regarding the synchronisation:
  • Synchronisation will only work for a users 'default' calendar in Exchange, not for other calendars they may be using
  • If Practice Master Pro is set up to use 'locations' (either for physical building locations or rooms in a single location) it should be noted that appointments created in Exchange will be imported in to Practice Master without a location
  • Exchange handles deleting of appointments in an unusual way. For this reason, deleting appointments is fully supported when done from the Practice Master calendars but not when done from inside Outlook.
  • Integration will work with new appointments and updates only from the point in time it is enabled and configured for your practice. This means existing appointments will not be pulled/pushed in either direction as duplicates would arise.


Enable Exchange Integration For The Practice

Step 1
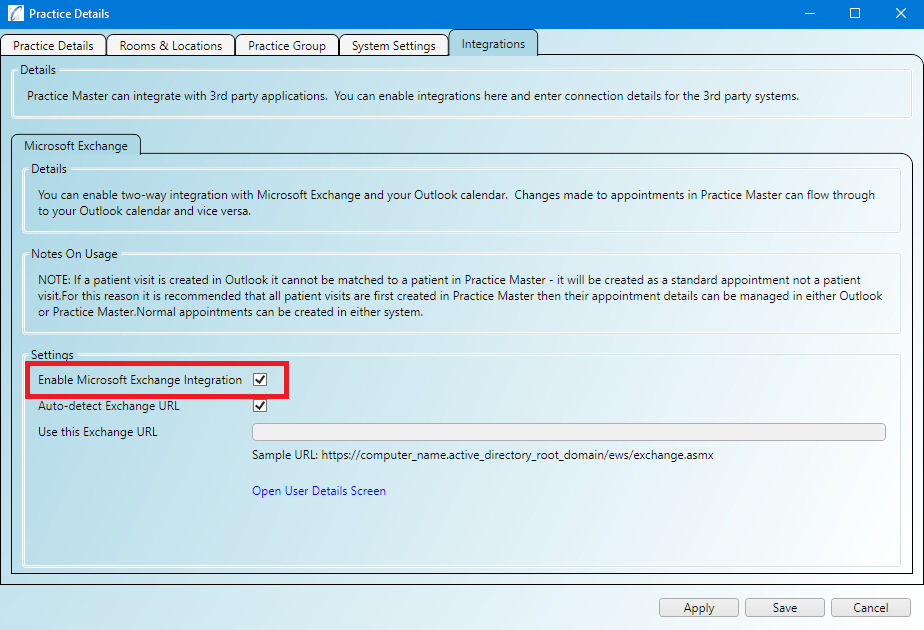
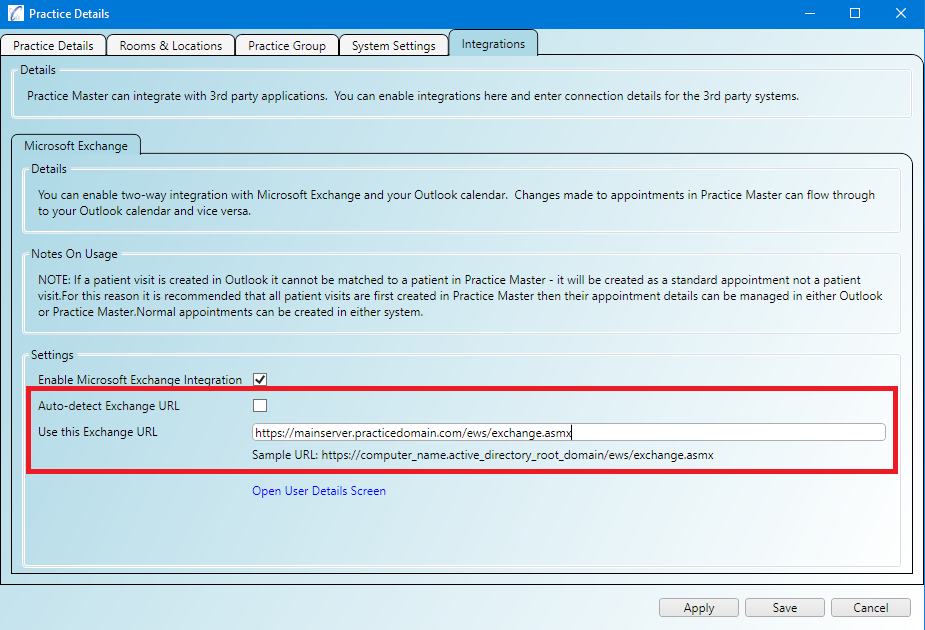
Open the screen 'Administration/Practice Details' and click on the 'Integrations' tab then tick the 'Enable Microsoft Exchange Integration' box

How to enable Microsoft Exchange integration for your practice

Step 2
It is recommended you tick the 'Auto-detect Exchange URL' box and use that method to locate the server first. Then click the 'Open User Details Screen' link at the bottom to add in the credentials for your users.


Enable Exchange Integration For Your Users

You will notice that since Exchange Integration is now enabled for your practice there is a new 'Integrations' tab visible on the User Details screen

The Integrations tab in the User Details screen

Step 1
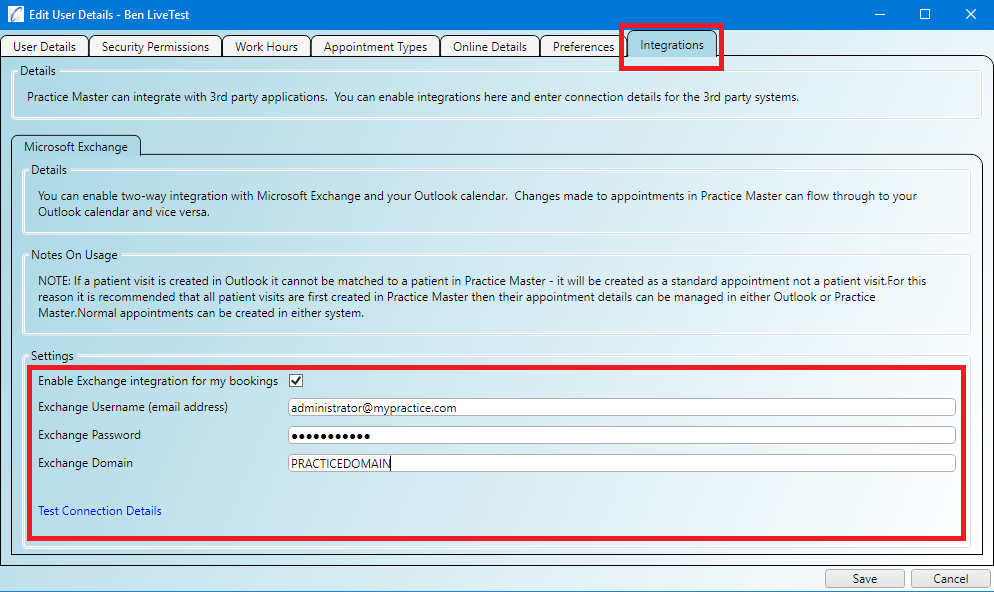
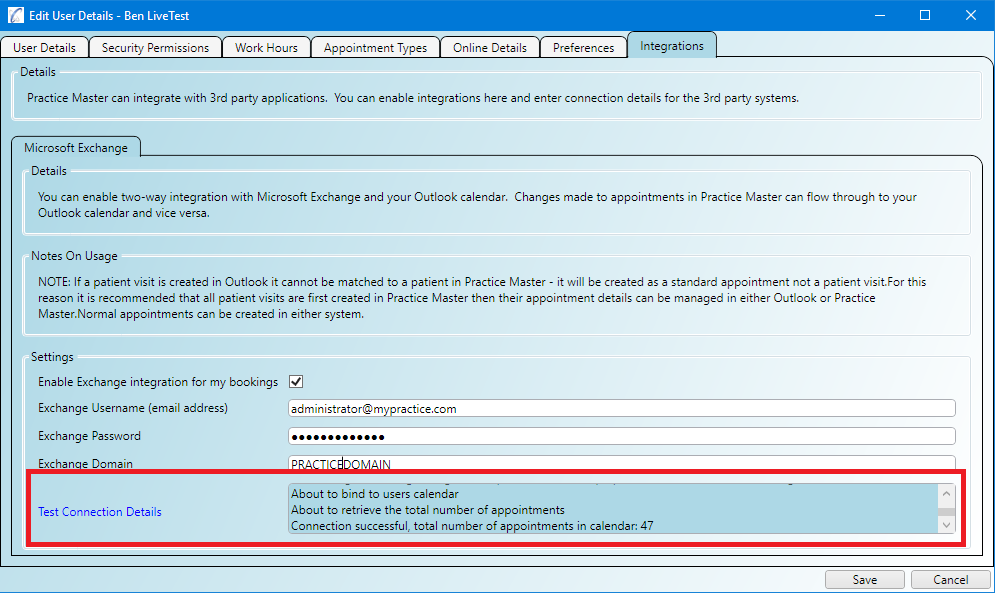
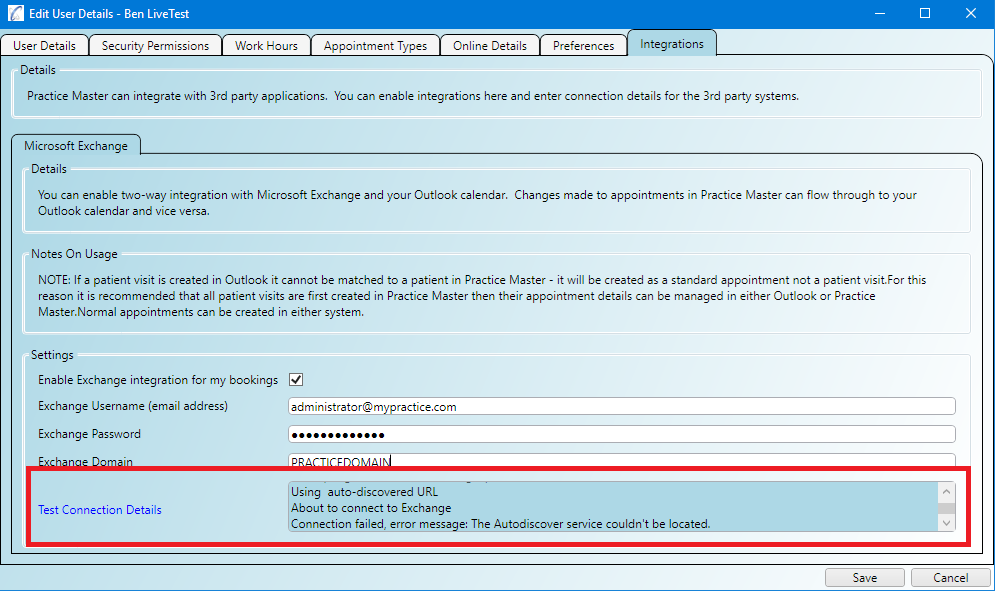
Fill out the Exchange details for this user and click the 'Test Connection' link. If it is successful you will see a log message similar to the one below

Successfully testing your Exchange connection details

Step 2
If the connection details are wrong you may see a message similar to the one below

Unsuccessfully testing your Exchange connection details

Step 3
In which case you should return to the Practice Details screen and manually enter in the Exchange URL as follows (use the computer name and domain which applies for your network)

Manually entering an Exchange URL

Step 4
Of course if the error message in Step 2 above is related to the users details then you can simply change them and click the 'Test Connection' link again.

Step 5
Once you have successfully configured your connections your calendars will stay automatically synchronised. Any changes you make to appointments in Exchange from this point on will appear in Practice Master and vice versa.